
OIDC (OpenID Connect) allows users to sign into a website / application without having to create a new account and password. Instead the sign-in process is delegated to a trusted OIDC PROVIDER (e.g. Google, Okta, Auth0, Azure AD etc.). Users can then “Sign in with …” that designated provider.
The OIDC Configuration page allows you to connect your OIDC provider to Intelligent Assets (IA). Once configured, users can authenticate with your provider and have their roles and groups automatically assigned in IA.
This guide walks through the available configuration options:
-
General Settings
-
Roles Settings
-
Groups Settings

Configuring an OIDC provider
Note: OIDC providers must be registered in your platform’s Admin OIDC Management Page before they can be configured in IA
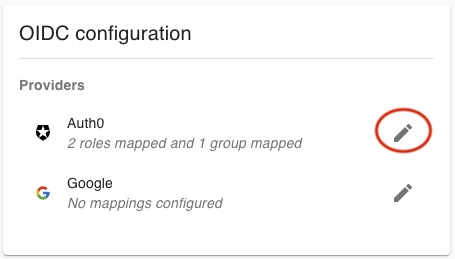
First access the OIDC page by navigating to Settings via the User menu at the top-right of the browser tab, then select OIDC under the System menu. Then scroll down to find the OIDC configuration panel beneath the password requirement config.
To configure an OIDC provider, click on the pencil icon pencil icon pencil icon (
Save in the bottom-right corner.
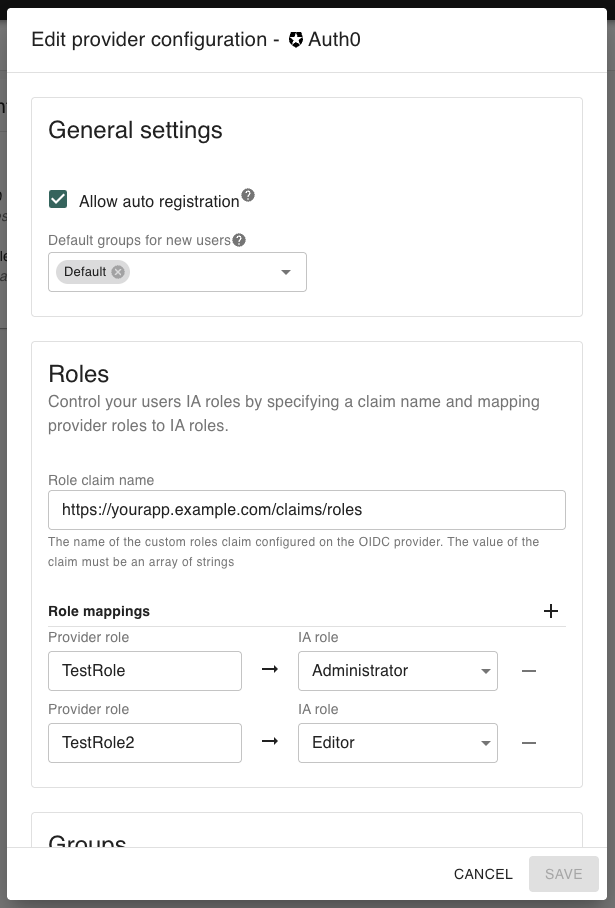
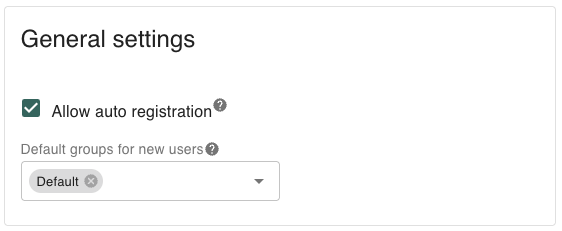
General Settings
General settings define how users are registered into IA when authenticating through your OIDC provider.
-
Allow auto-registration
-
If enabled: users who log in with your OIDC provider for the first time will automatically be registered in IA.
-
If disabled: users must be manually invited to IA before they can log in with the OIDC provider.
-
-
Default groups for new users
-
When auto-registration is enabled, you can optionally assign users to one or more default groups.
-
Default groups are applied at registration time.
-
This can be used instead of group mappings (see Groups Settings).
-
If no default groups are selected, new users will not be assigned to any groups unless group mappings are configured.
-
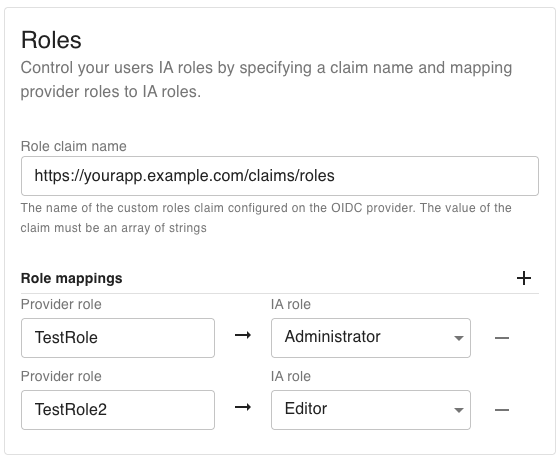
Roles Settings
Roles settings let you map roles from your OIDC provider into IA roles.
-
Role claim name
-
The name of the custom claim in your OIDC provider that contains role information.
-
The claim must return an array of strings.
-
Example:
"https://yourapp.example.com/claims/roles": ["admin", "editor"]
-
-
Role mappings
-
Define one or more mappings that connect provider roles to IA roles.
-
Example:
-
OIDC role
"admin"→ IA role Administrator -
OIDC role
"editor"→ IA role Editor
-
-
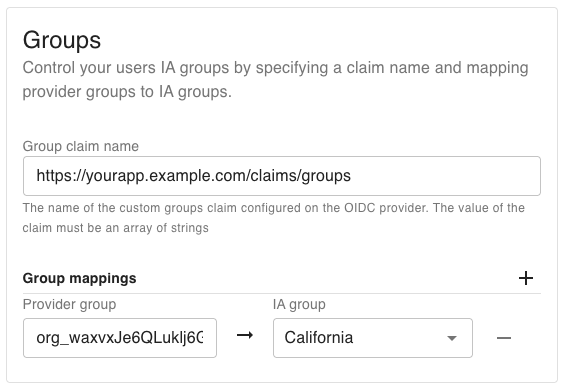
Groups Settings
Groups settings let you map groups from your OIDC provider into IA groups.
-
Group claim name
-
The name of the custom claim in your OIDC provider that contains group information.
-
The claim must return an array of strings.
-
Example:
"https://yourapp.example.com/claims/groups": ["sales", "engineering"]
-
-
Group mappings
-
Define one or more mappings that connect provider groups to IA groups.
-
Example:
-
OIDC group
"sales"→ IA group Field Sales -
OIDC group
"engineering"→ IA group Engineering Team
-
-
Tip: You can use either default groups, group mappings, or both. Default groups are applied universally, while group mappings allow finer-grained control.