Summary: what is a measurement profile?

A measurement profile provides a structured way to manage how data from asset attributes is displayed in different units of measurement. Each profile represents a specific type of measurement, such as temperature, speed, distance, or pressure. Within a measurement profile, one or more preferred units can be defined – for example, a temperature profile may include Kelvin (K), Celsius (°C), and Fahrenheit (°F). This approach ensures that values from the same attribute can be presented consistently across regions, teams, and organizational contexts.
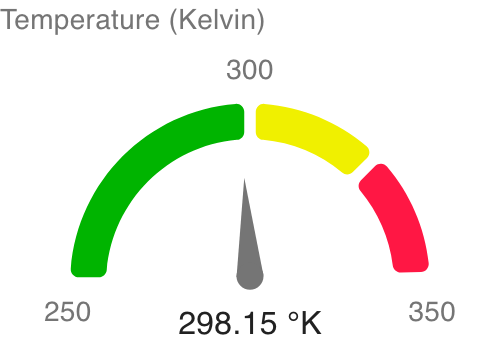
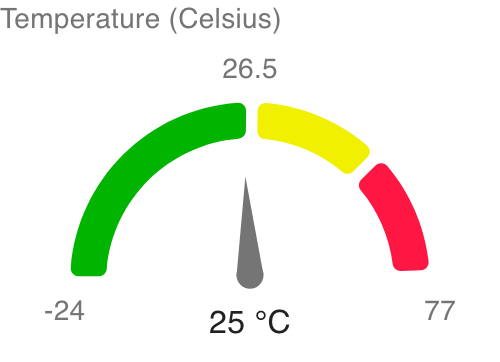
The primary purpose of measurement profiles is to ensure that asset attribute values are automatically converted into the appropriate unit for each user. For instance, consider a laboratory instrument, such as a precision thermal sensor, that outputs its Temperature attribute in Kelvin. If the asset’s temperature is 298.15 °K, an American user may see this attribute displayed as “77 °F”, while a French user viewing the same attribute would see “25 °C”. These conversions are applied automatically at the attribute level, ensuring that measurements remain meaningful and accessible regardless of user location or preference.
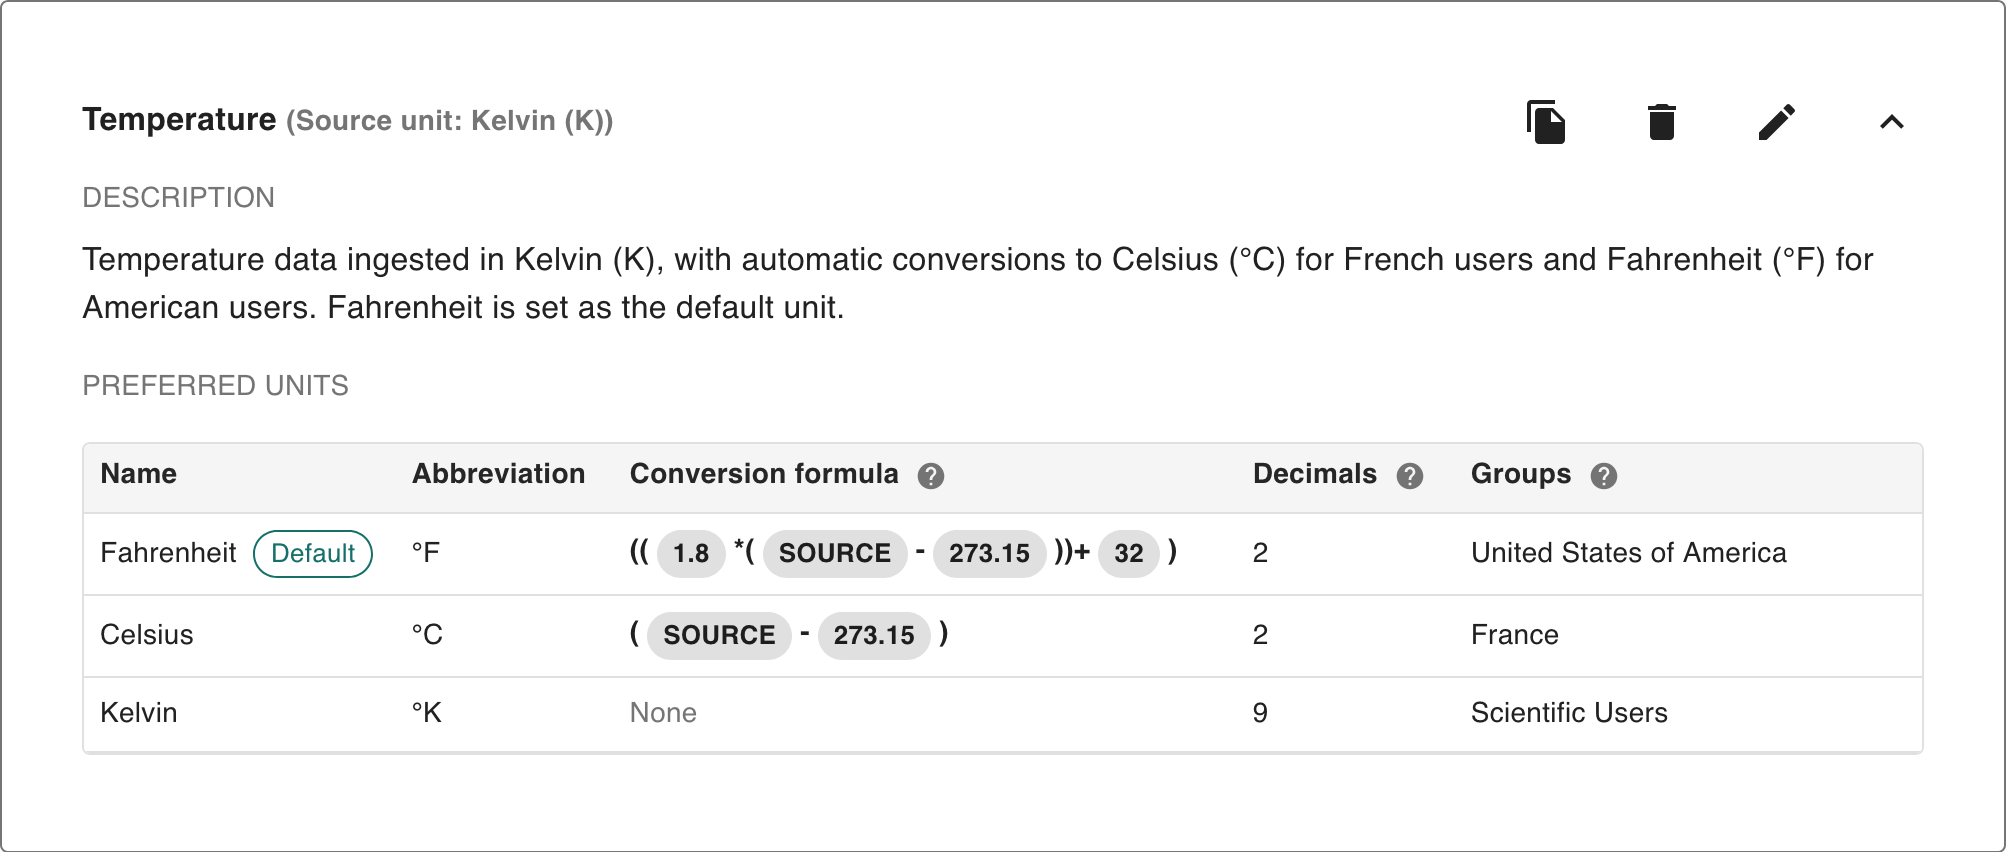
Each profile may also specify a source unit, which represents the unit in which raw data for the attribute is ingested from client pipelines or external systems. The source unit serves as the baseline for all conversions. For each preferred unit, a corresponding conversion formula can be defined to translate values from the source unit. For example, converting Kelvin to Celsius may be expressed as SOURCE – 273.15, while converting Kelvin to Fahrenheit may be expressed as 1.8 × (SOURCE – 273.15) + 32. By tying a measurement profile to an asset’s attribute, the system ensures that all conversions for that attribute are consistent and predictable.
Measurement profiles additionally provide mechanisms for controlling access to units. Administrators can assign user groups to specific units so that different audiences see data in formats most relevant to their context. For example, a group based in France may be assigned Celsius, while a group in the United States may be assigned Fahrenheit. Individual users may also define an override to select a different unit than the one assigned to their group. This flexibility accommodates both organizational standards and personal preferences.
Finally, each profile can designate a default unit. The default acts as a fallback when no user preference or group assignment applies, ensuring that data can always be displayed predictably. For example, if the majority of users are located in the United States, Fahrenheit may be set as the default unit for a temperature profile.
Creating/modifying measurement profiles
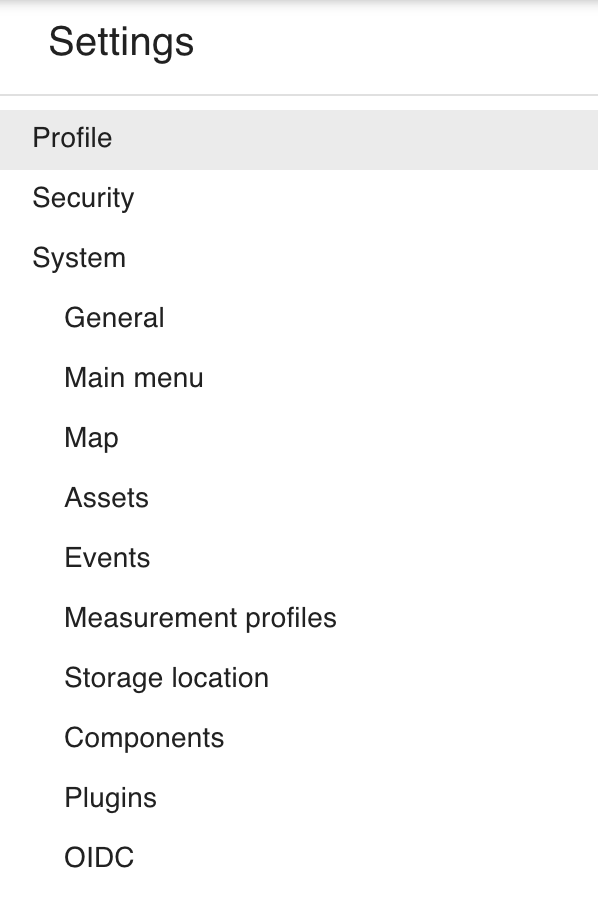
Accessing measurement profile settings
-
Click this icon on the top right of the page:

-
Click Settings.
-
Navigate to Measurement profiles on the left, under System:
-
You should now see the Measurement profile settings. From here, you can create, edit and delete measurement profiles.

Creating a new measurement profile
To create a new measurement profile, click the Add button ( ![]()

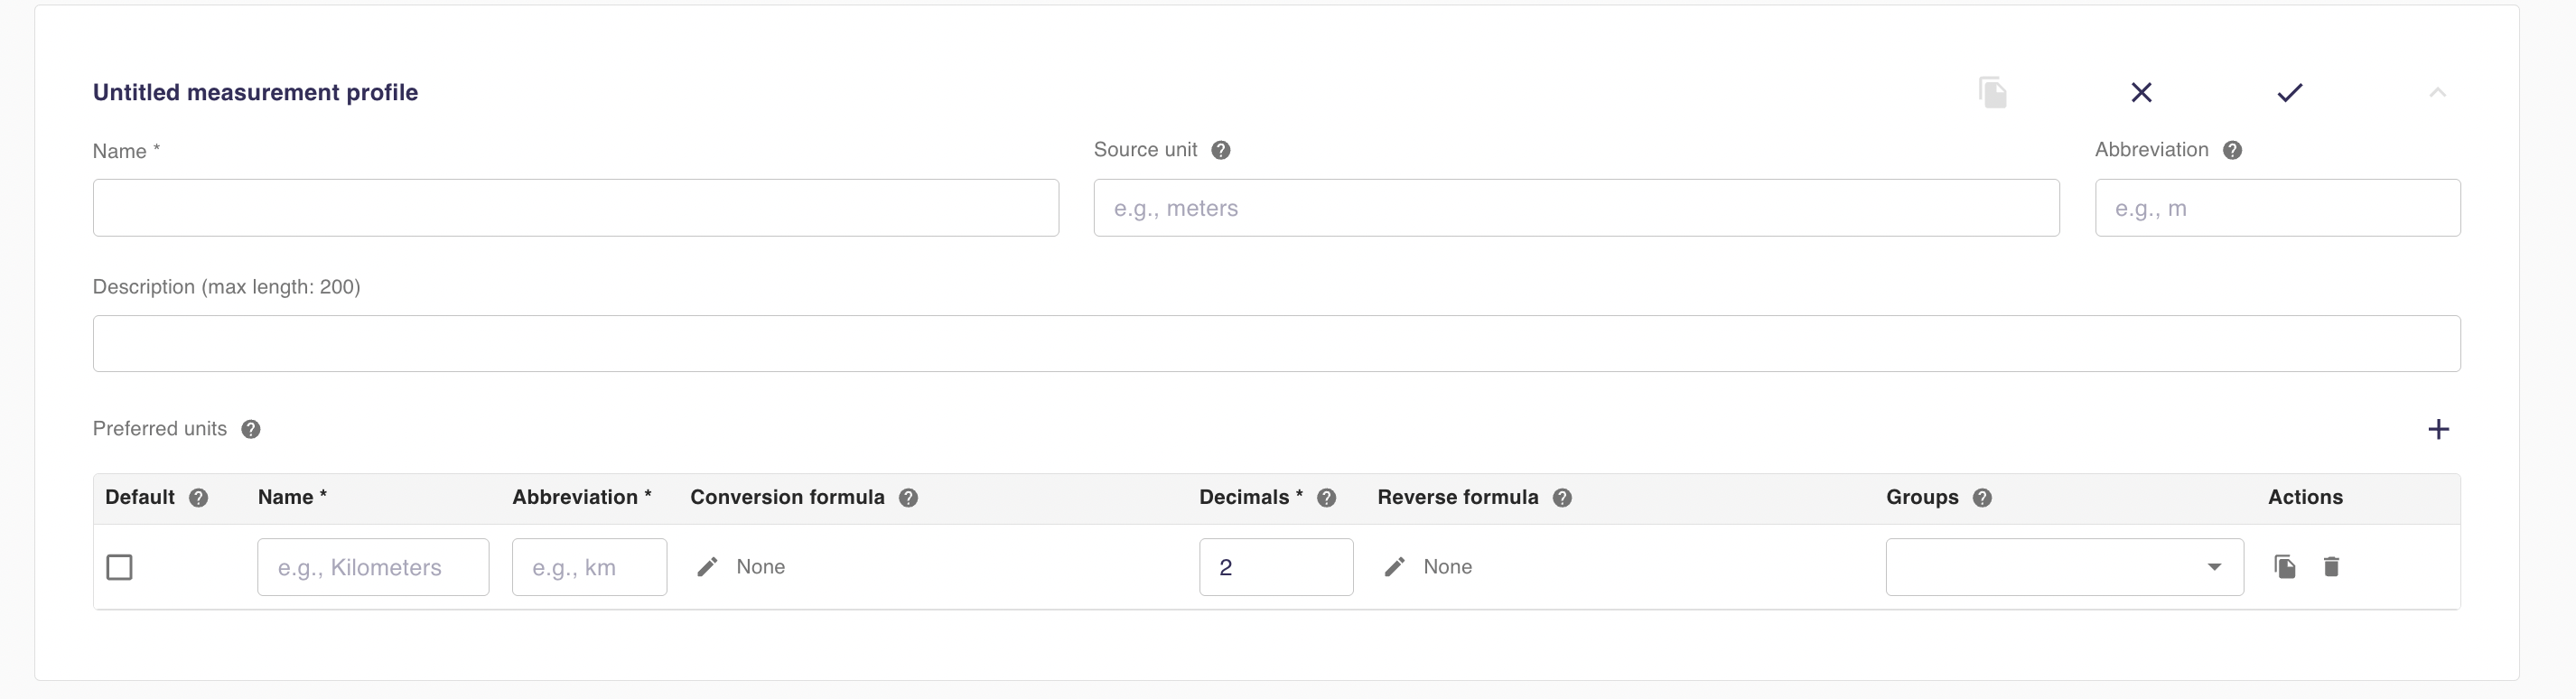
The new measurement profile is now available and ready for configuration:
Configuring a measurement profile
When configuring a measurement profile, administrators are able to edit the following:
-
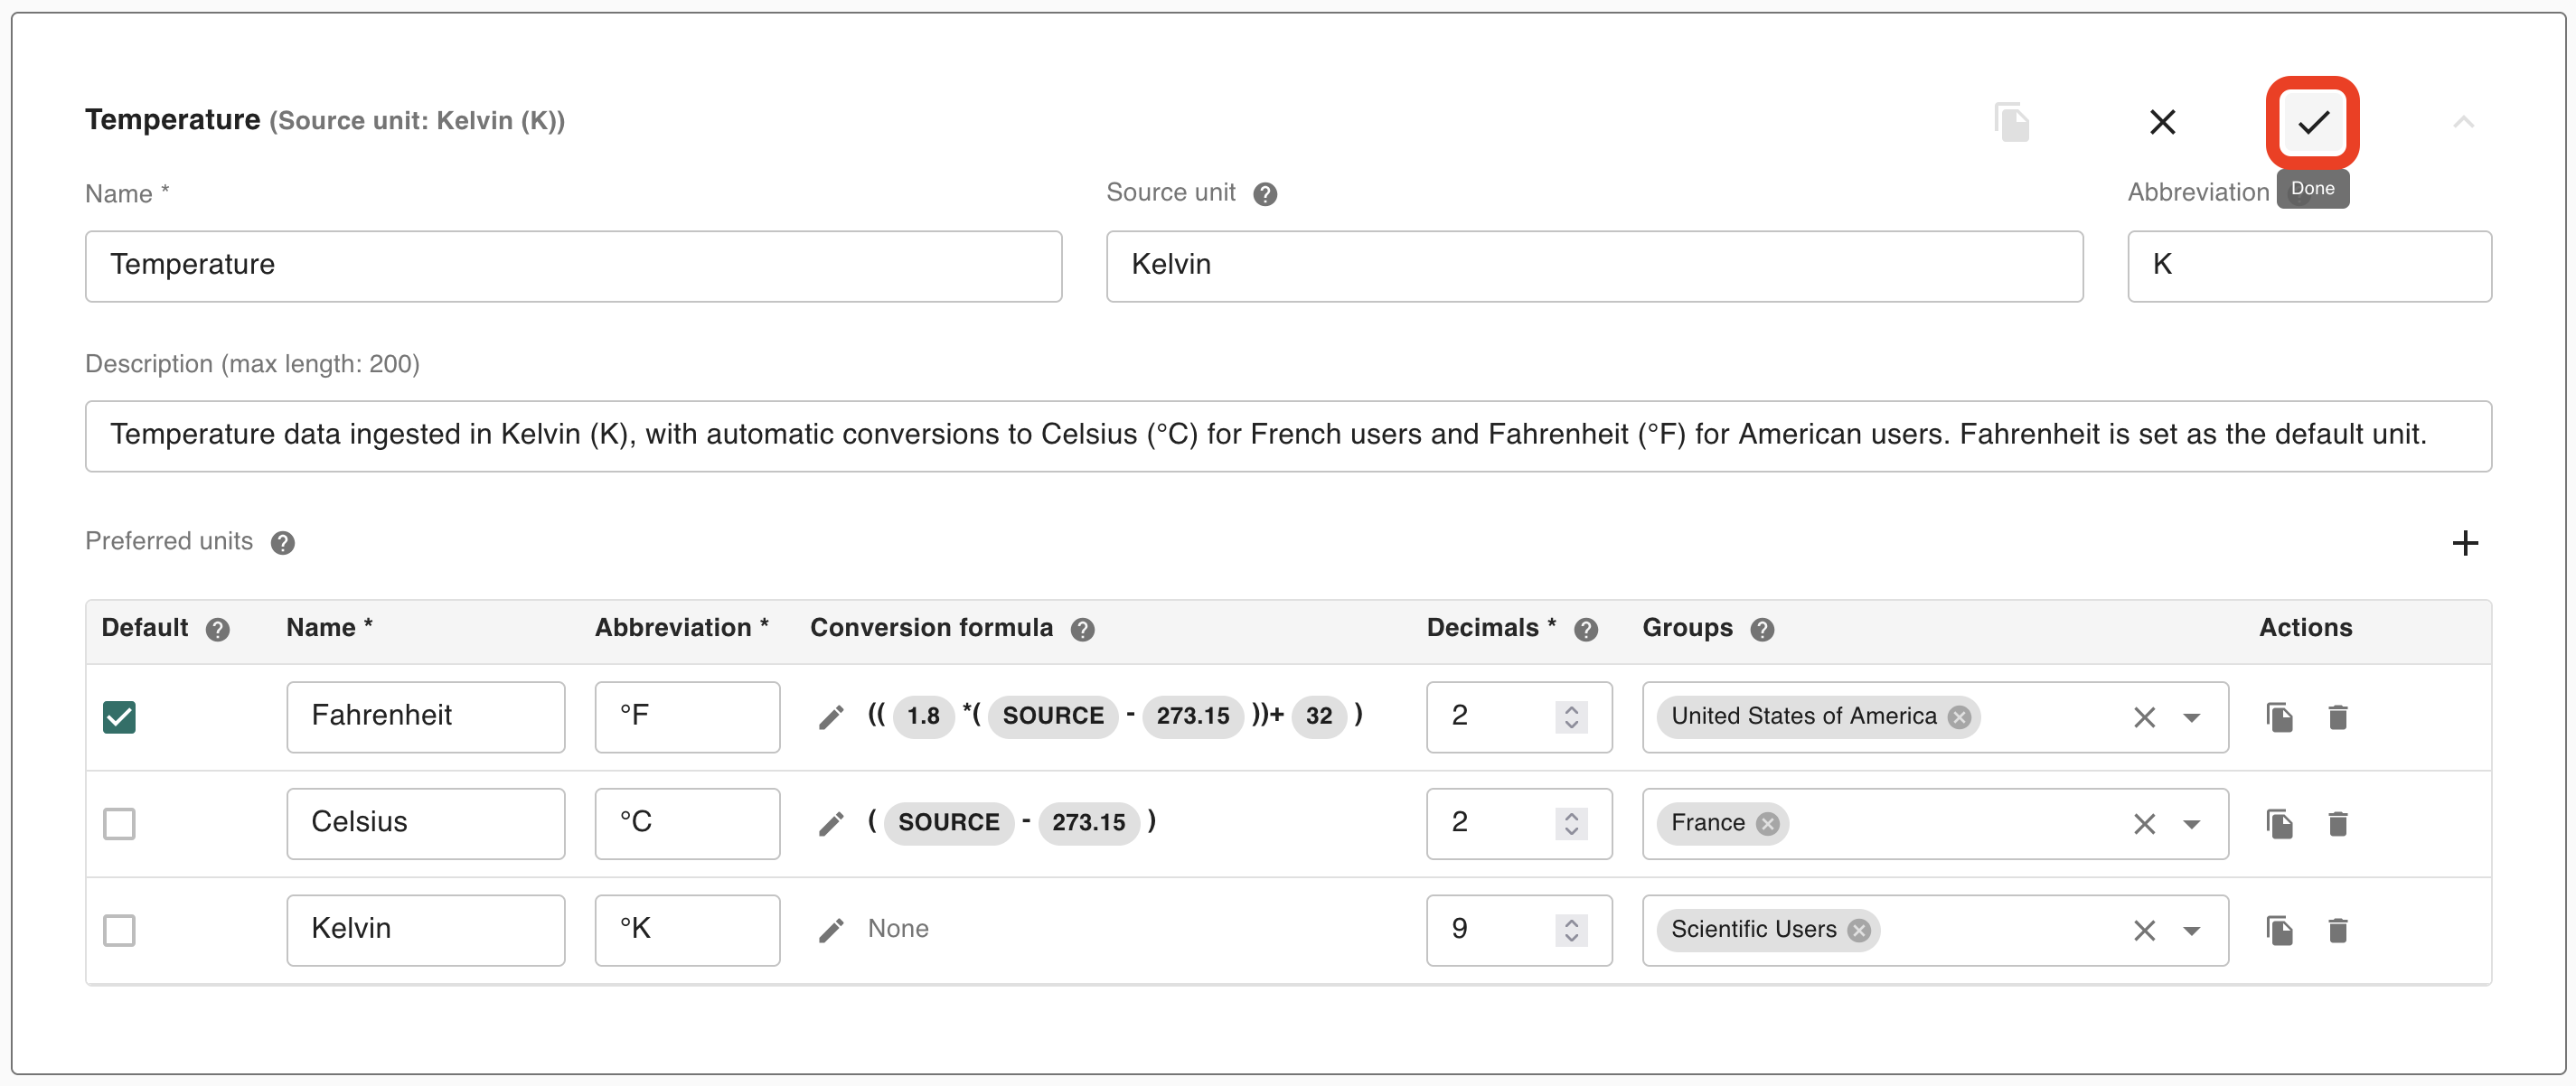
Name (required): the name of the measurement profile, e.g. Temperature.
-
Source unit: the unit in which data is received from the client. For instance, if a scientific sensor provides temperature data in Kelvin, a measurement profile should be set up for that attribute using Kelvin as the source unit. Multiple profiles can exist for the same measurement type – e.g., one for Kelvin and another for Celsius – making the source unit the distinguishing label and the baseline for conversions.
-
Source unit abbreviation: the abbreviation for the source unit. If the source unit is Kelvin, the abbreviation would be °K.
-
Description: a description for the measurement profile, up to 200 characters.
-
Preferred units: the main content of the measurement profile. At least 1 required.
Configuring preferred units

Preferred units define how data is converted for each user depending on their settings and groups. A user based in the United States would likely prefer to see temperature conveyed in Fahrenheit, whereas a user based in France would prefer the same information presented in Celsius. Preferred units are used to define conversion formulae for each unit, as well as other important information on each unit including its name, abbreviation, number of decimals for rounding and attributed groups.
Default (optional)
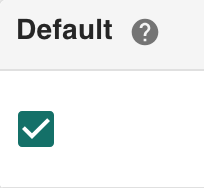
A preferred unit can be designated as the “default” preferred unit by toggling the checkbox in the Default column. This will cause that preferred unit to be used as the fallback unit in case no other preferred unit can be identified as a user’s preferred unit. The preferred unit a user sees when viewing an attribute tied to a measurement profile is determined by the following rules, prioritized in this order:
-
Whichever preferred unit the user designated as their preferred unit in user settings.
-
Whichever preferred unit was tied to the user’s first group. If the user’s first group is United States of America, and the group was tied to the Fahrenheit preferred unit, they will see the attribute converted to °F.
-
Whichever preferred unit is designated as the default, defined in the Default column in the Preferred units table in measurement profile settings. This only happens if rules #1 and #2 yield no preferred units.
If no preferred unit can be determined from any of these rules, the user will see the raw data, unconverted and without an associated unit. Therefore, while not strictly required, it is recommended to designate a default preferred unit.
Name (required)
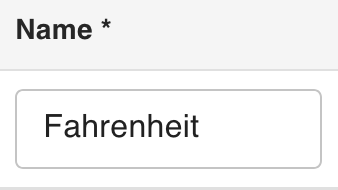
The name of the preferred unit, e.g. Fahrenheit or Celsius.
Abbreviation (required)
The abbreviation of the preferred unit, e.g. °F or °C.
Conversion formula (optional)
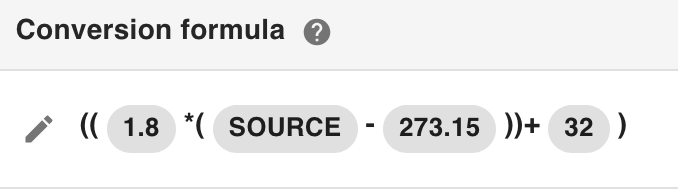
The formula used for converting from the source data to the preferred unit. For example, to convert from Kelvin data to Fahrenheit, the following equation is used:
°F = 1.8 × (°K - 273.15) + 32
When complete, the equation will appear in Intelligent Assets as:

SOURCE ( ![]()
The conversion formula can be left blank if the preferred unit matches the source unit and requires no conversion. For example, if data is originally received in Kelvin, a Kelvin preferred unit would not require a conversion formula.
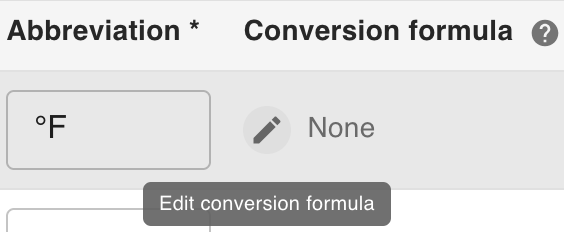
To create or modify a preferred unit’s conversion formula, click the pencil icon ( ![]()
This will open the formula builder dialog box:
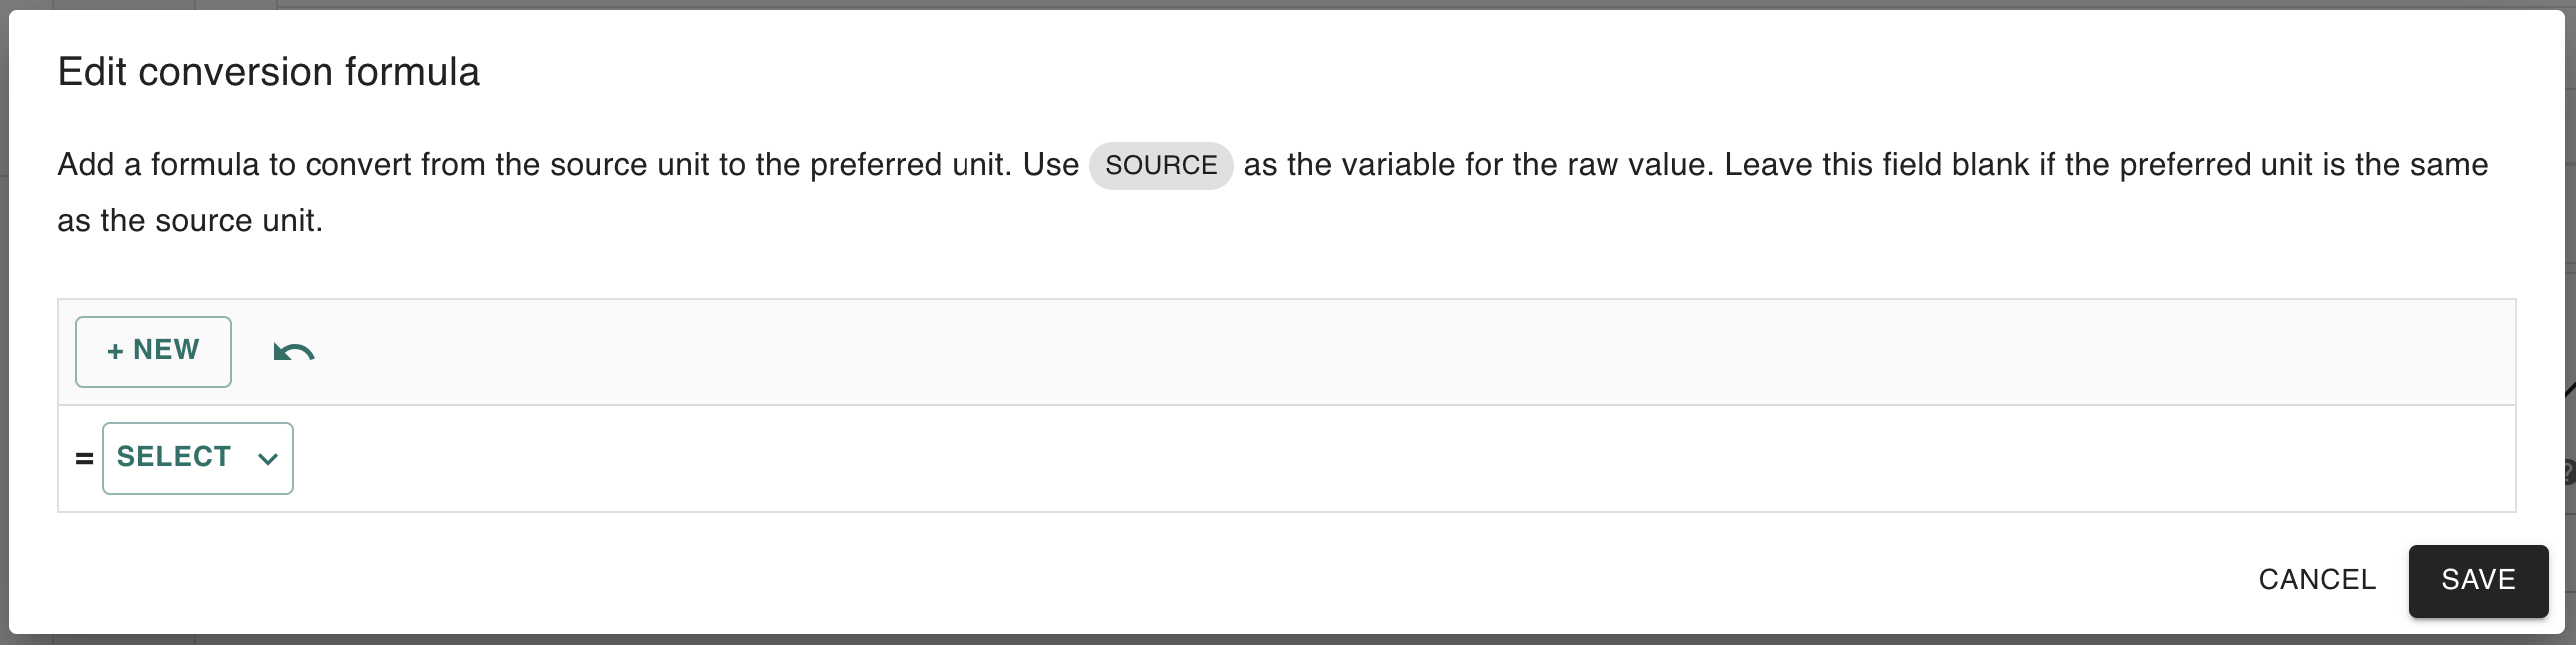
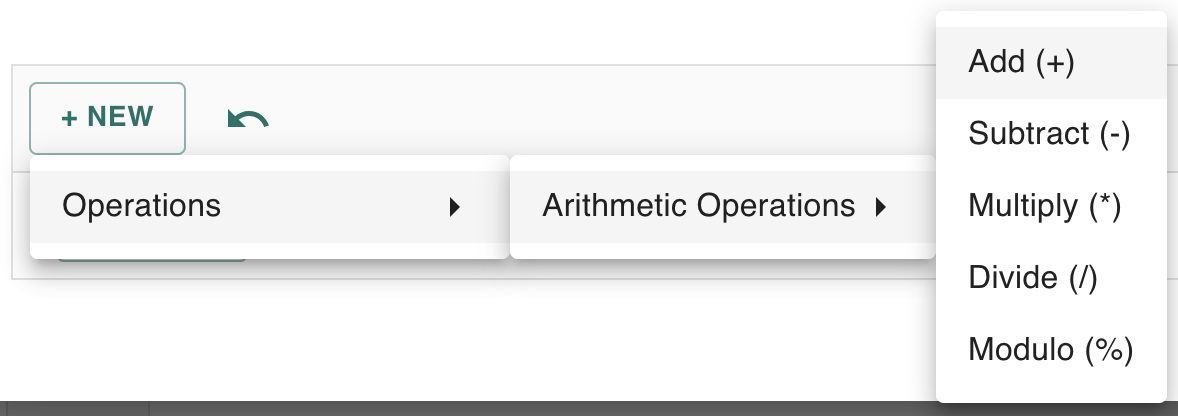
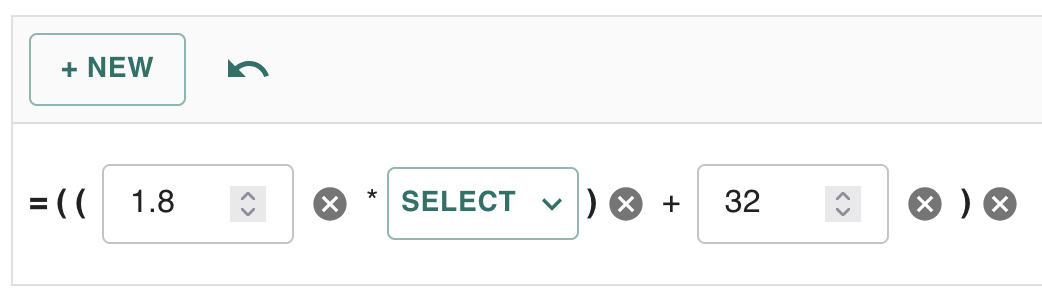
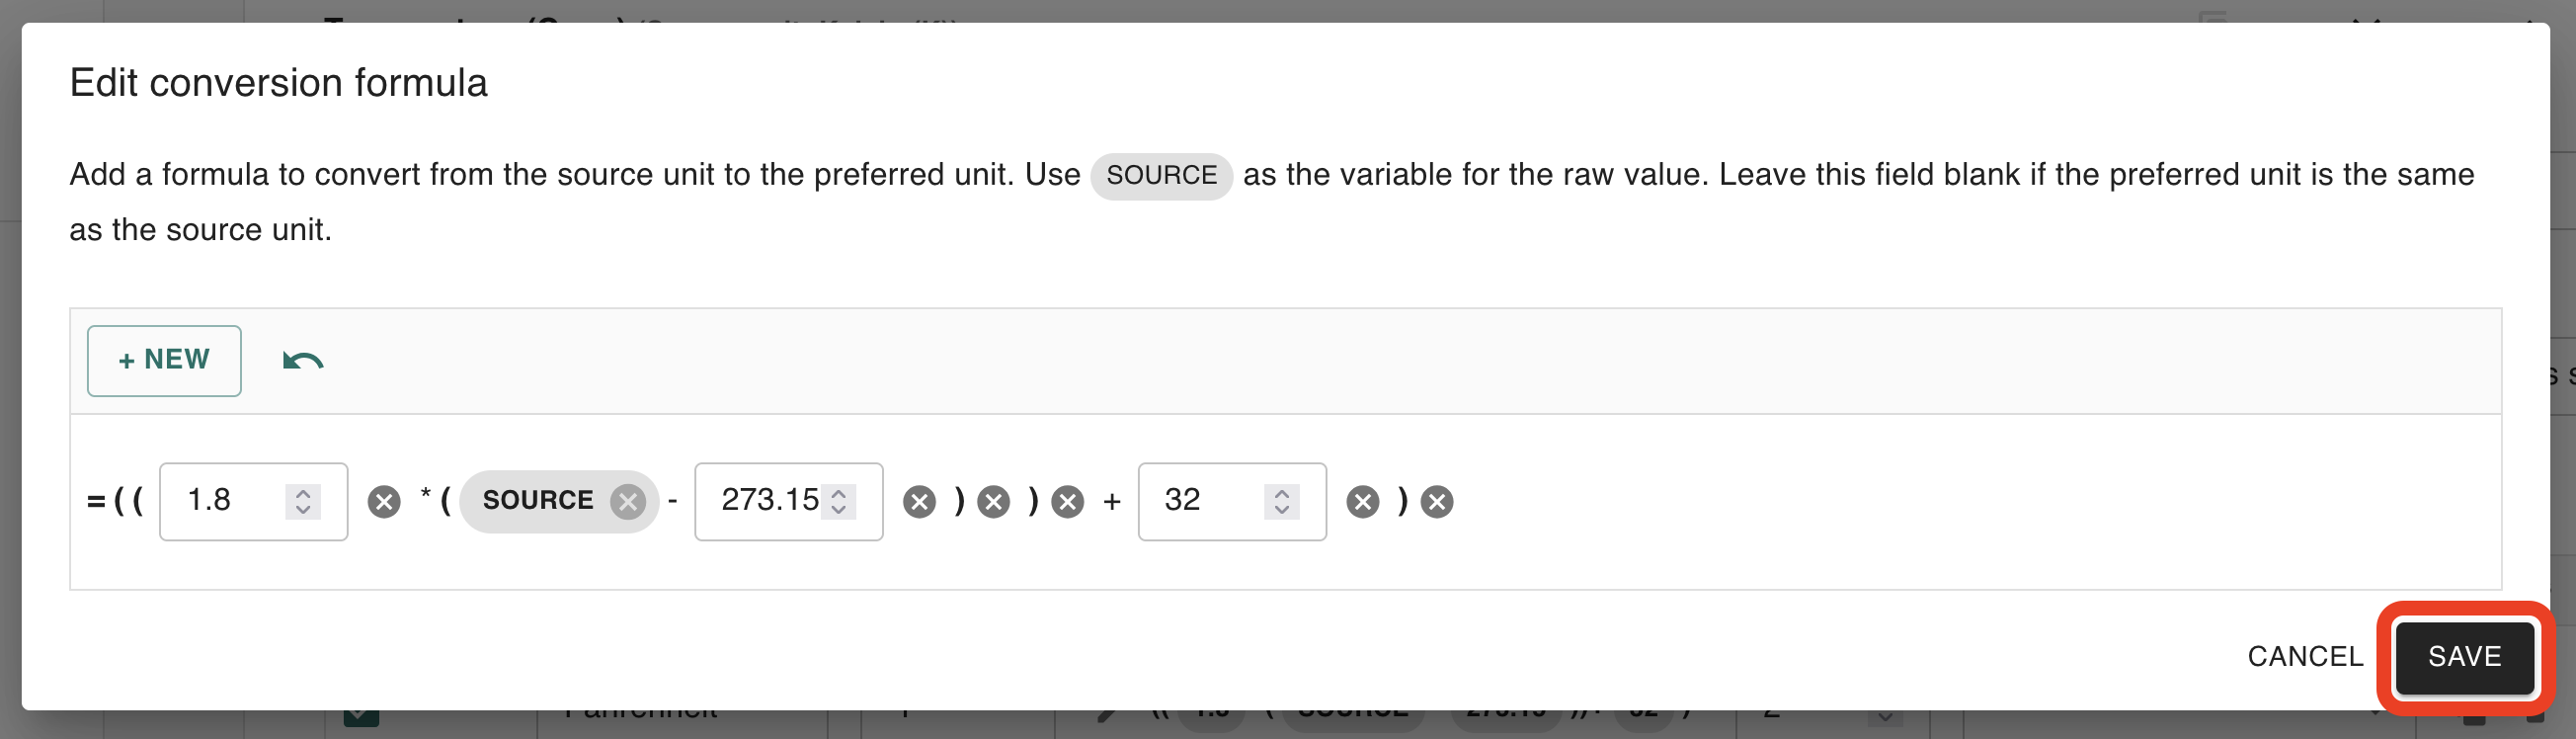
To define the conversion formula from Kelvin to Fahrenheit, we begin by defining the outermost operation (______ + 32). To do this, click the + NEW button, then select Operations > Arithmetic Operations > Add (+):
Each SELECT button that appears afterwards can be used to define another nested operation, constant, or SOURCE variable.
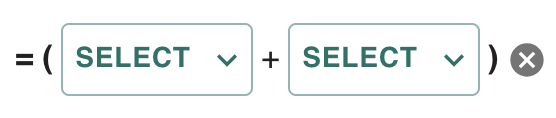
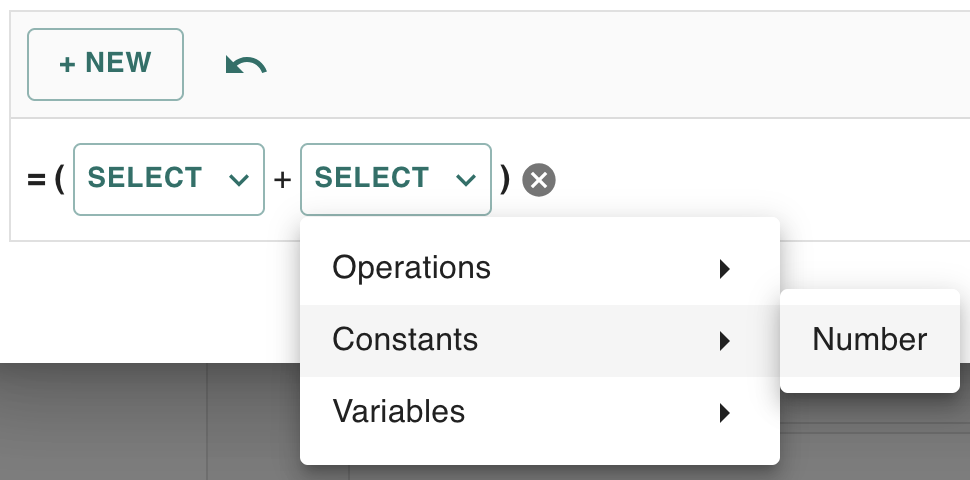
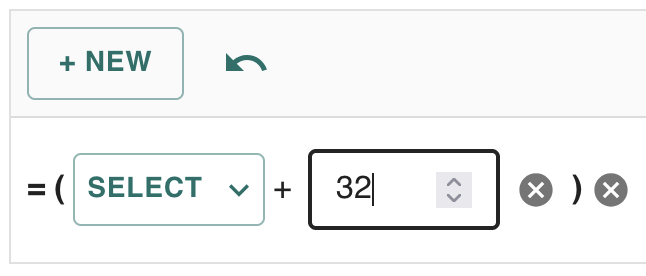
To add 32 as a constant, we can click the rightmost SELECT, then Constants > Number. We then enter “32” to the number field that appears.
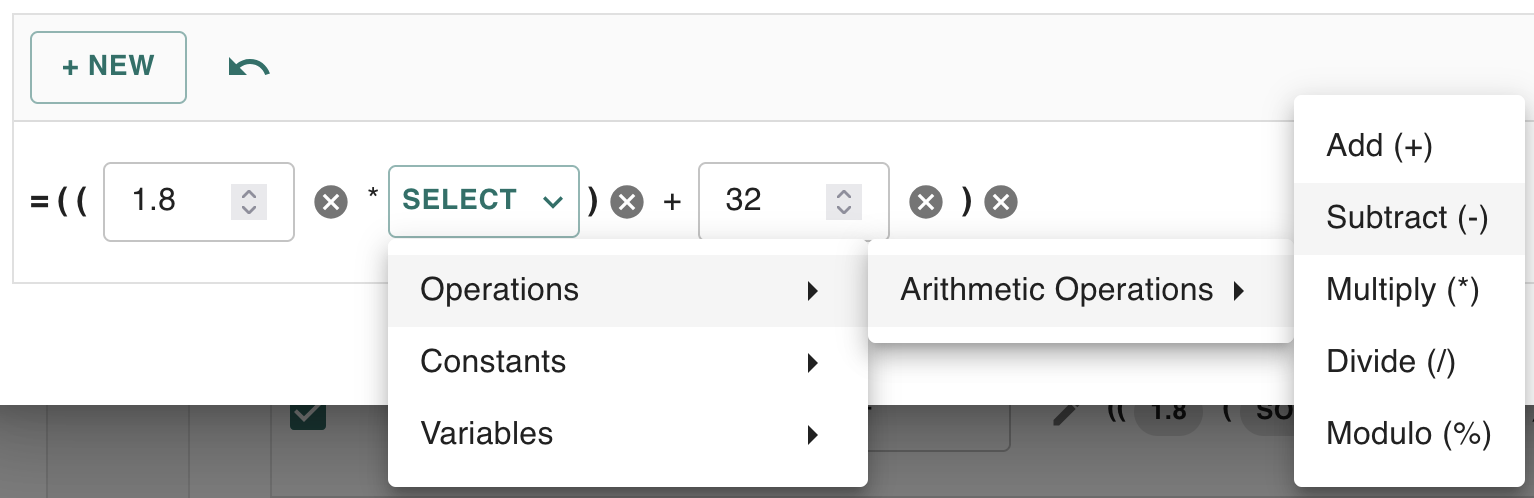
The next operation to create is (1.8 × ______). We first click the leftmost SELECT, then Operations > Arithmetic Operations > Multiply (*). We then create a new constant on the left side of this nested operation, resulting in the following:
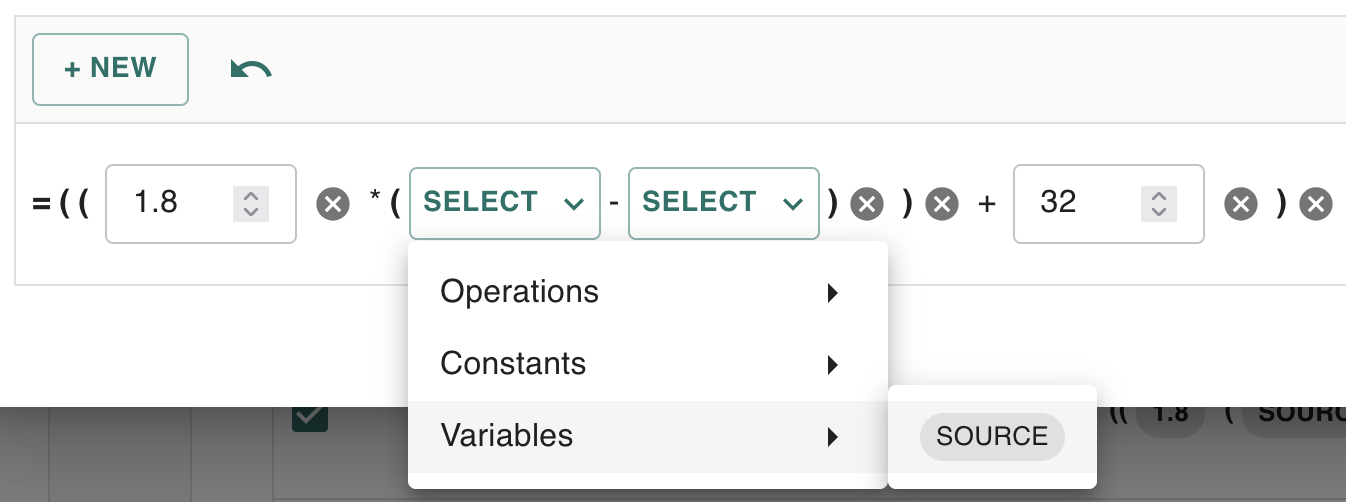
Finally, the innermost operation: (°K - 273.15). First, we create a new subtraction operation by clicking SELECT > Operations > Arithmetic Operations > Subtract (-):
In the original equation, °K is a variable representing the original source data received in Kelvin. Thus, to represent (°K - 273.15), we add the SOURCE variable ( ![]()
Then enter 273.15 as a constant to the right:
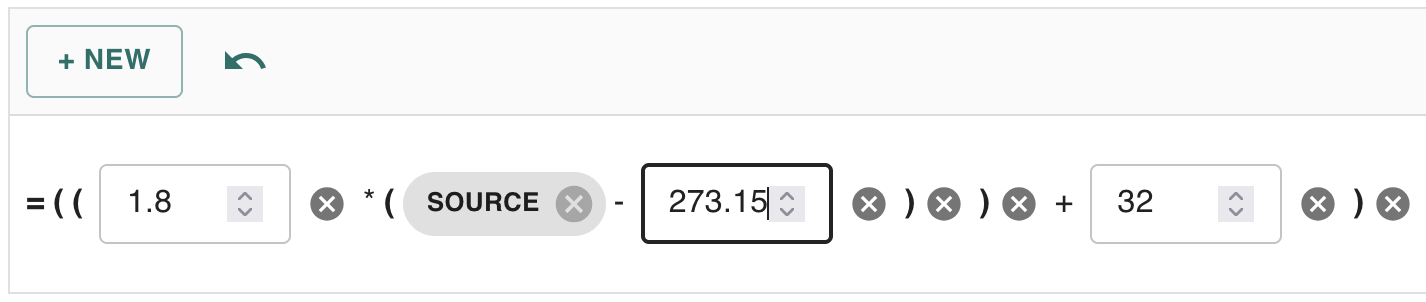
We are now ready to save the equation. To do this, click the SAVE button in the bottom-right corner of the dialog box:
The conversion formula will now appear for the preferred unit:
Decimals (required)

This field specifies the number of decimal places to which converted values are rounded. The default value is 2.
Reverse formula (optional)
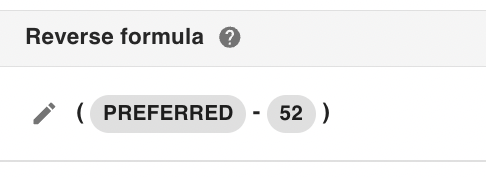
This formula is used to convert a unit back to the raw source unit. This formula is needed when user input is entered in the preferred unit but must be stored or processed in the source unit.
Groups (optional)
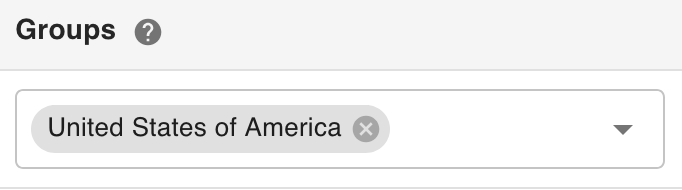
Specifies the user groups that will automatically see this preferred unit when attributes tied to the measurement profile are displayed. Users can override this setting in their Profile settings, but if no override is set, members of the groups listed here will see this preferred unit by default.
Each group can only be assigned to a single preferred unit.
Actions
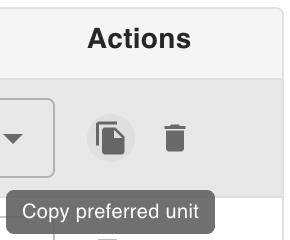
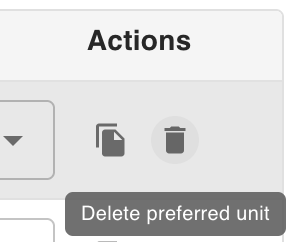
When editing a measurement profile, the Actions that appear in the rightmost column of the Preferred units table can be used to copy or delete a preferred unit.
Saving changes to a measurement profile
To save changes made to a measurement profile, click the Done button ( ![]()
Configuring an attribute to use a measurement profile
-
Navigate to the Asset Types page via the left-hand navigation menu:

-
Select the asset type to modify. For example, a Precision Thermal Sensor:

-
Click the Edit button (


-
In the menu that opens, select Attributes on the left-hand side:

-
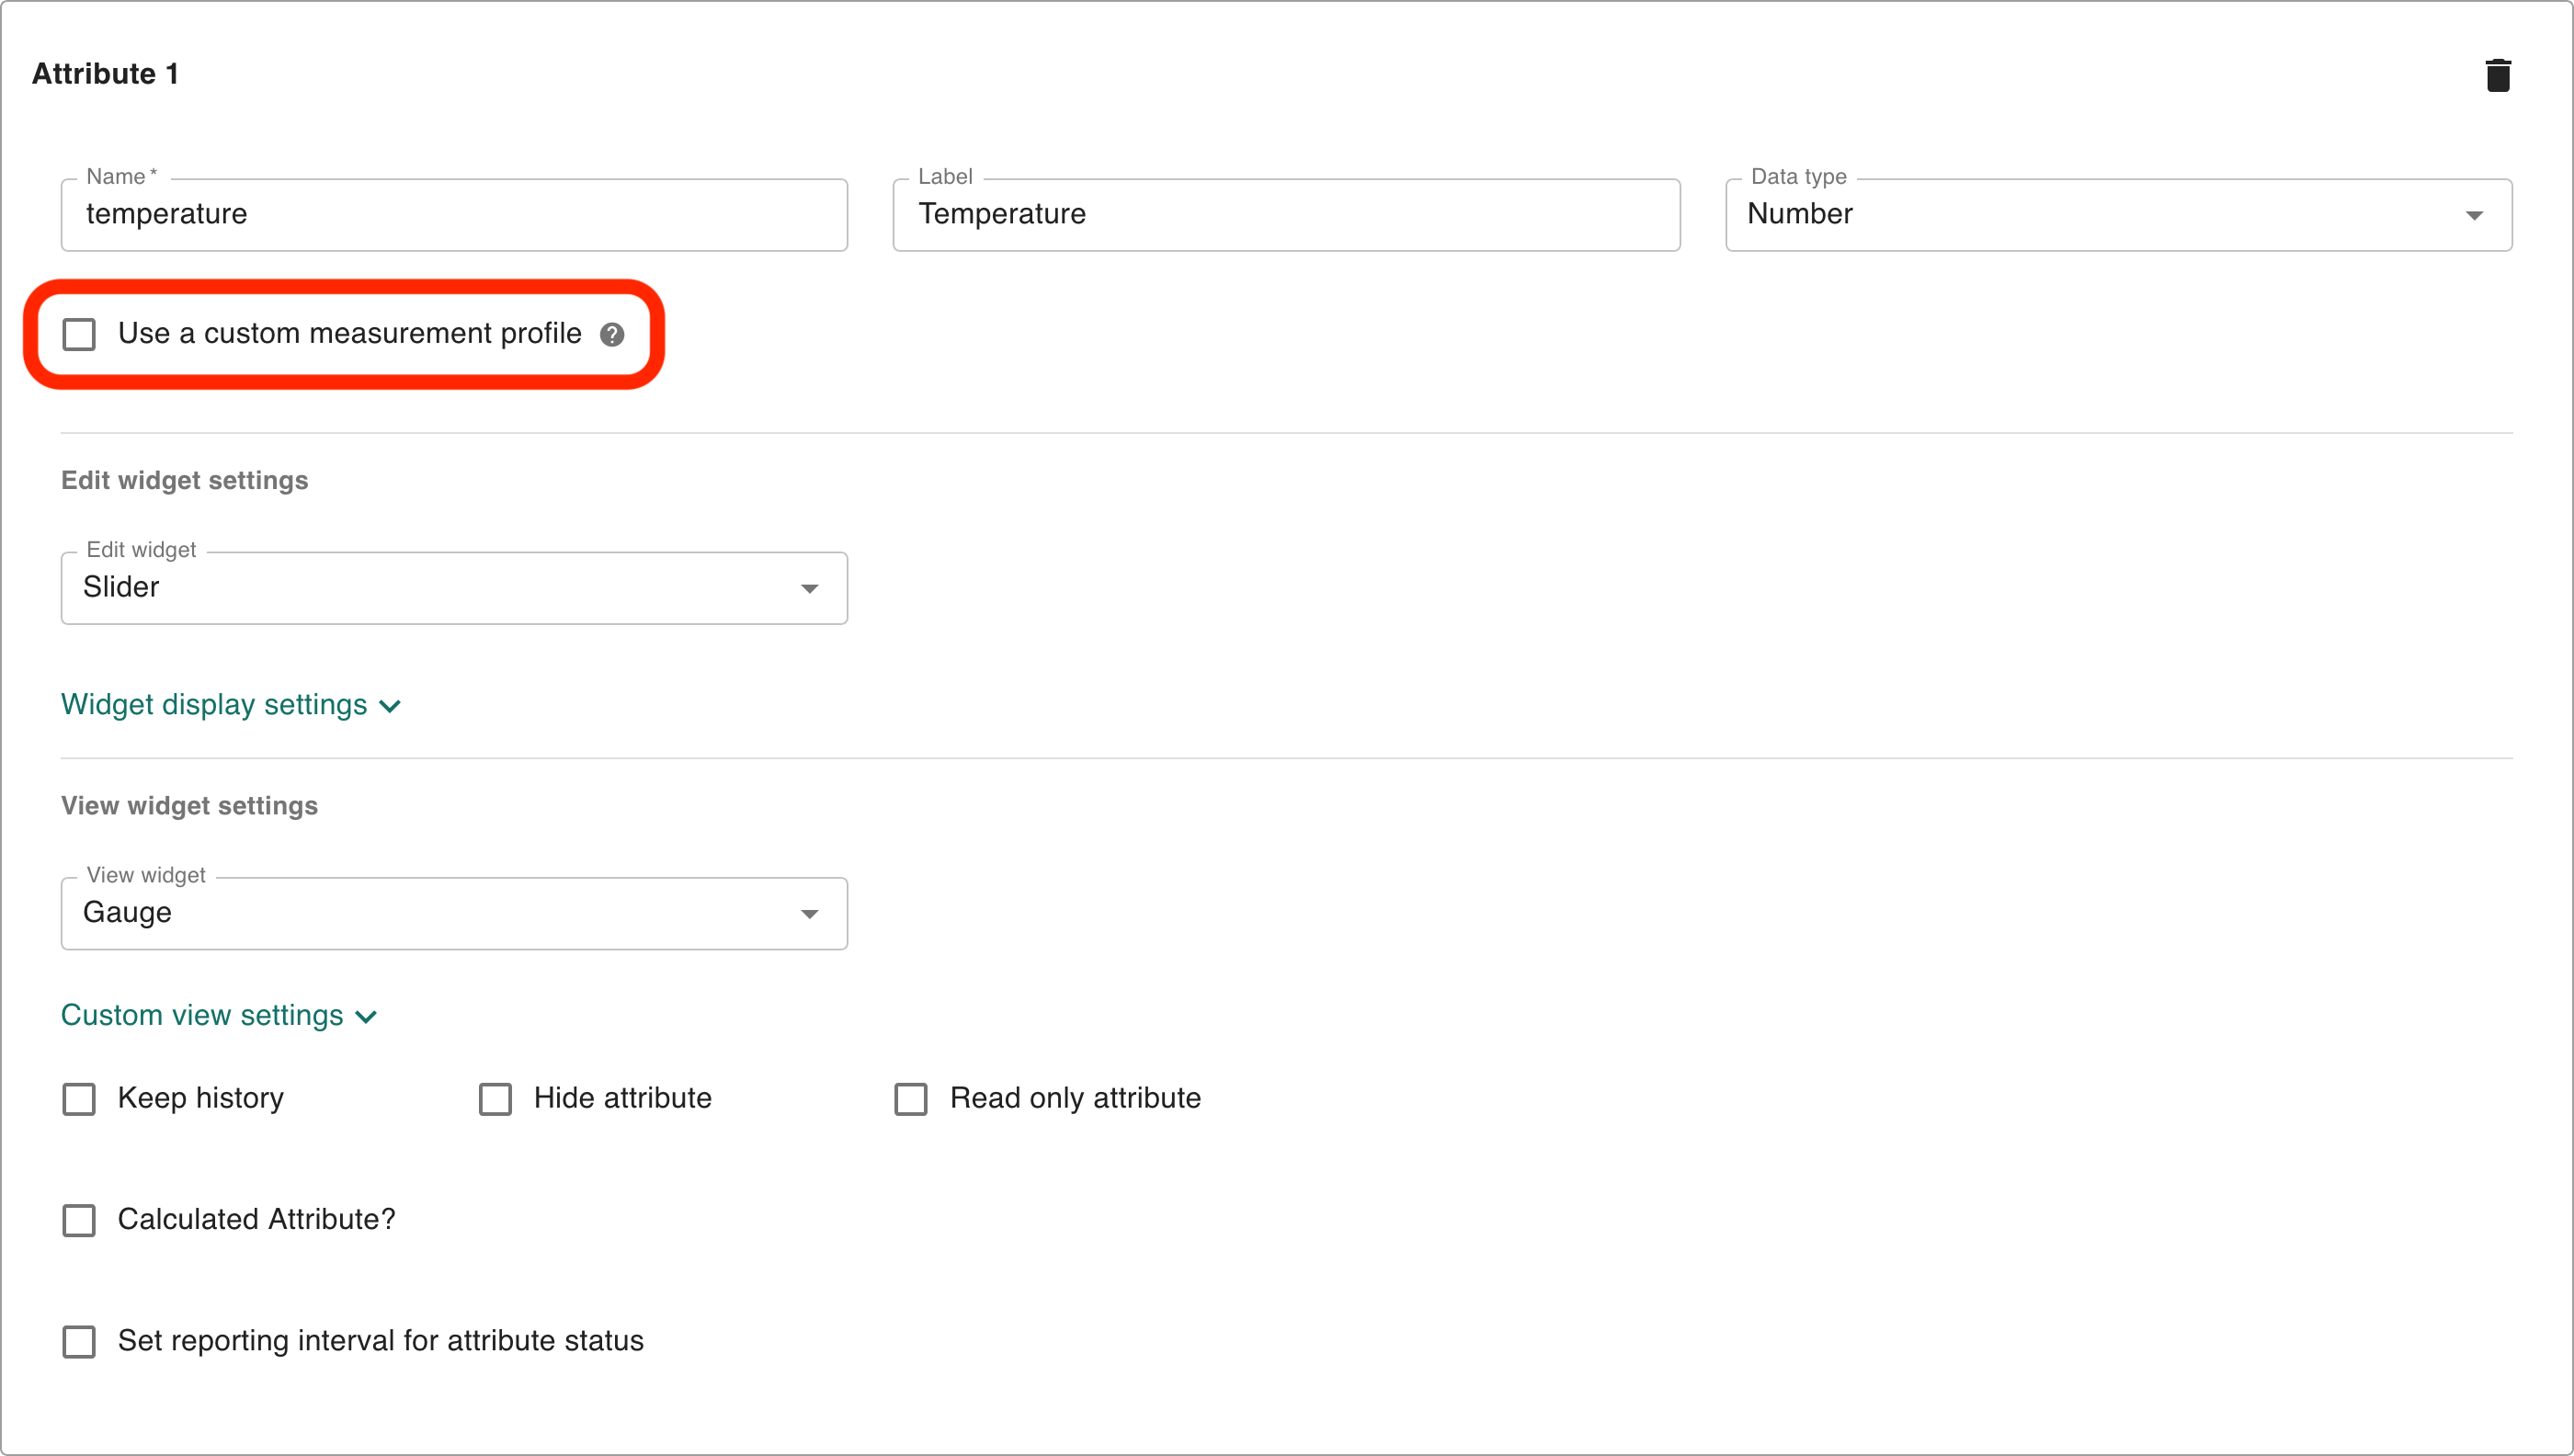
Scroll to find the attribute you wish to tie to a measurement profile. This attribute’s Data type must be “Number”, as only numerical values are eligible for conversion. Then, check “Use a custom measurement profile”:
-
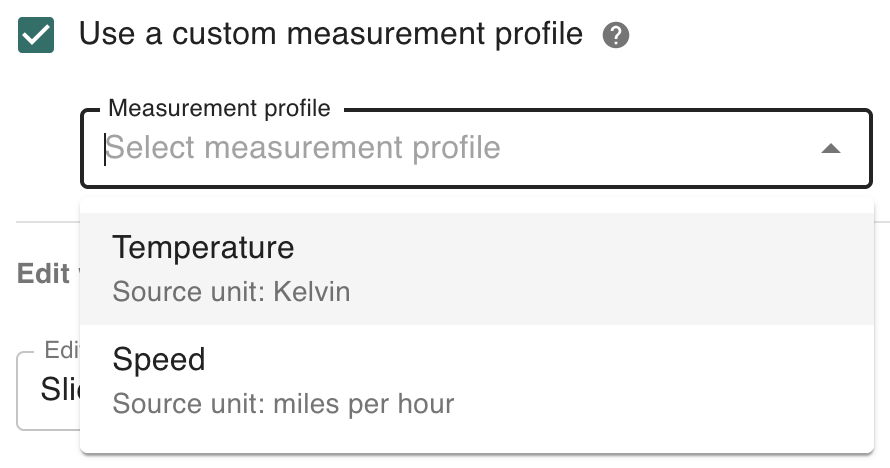
From the dropdown that appears, select or search for the measurement profile you wish to use for this attribute:
-
In the bottom-right corner of the menu, click Next > Next > Save to save your changes.

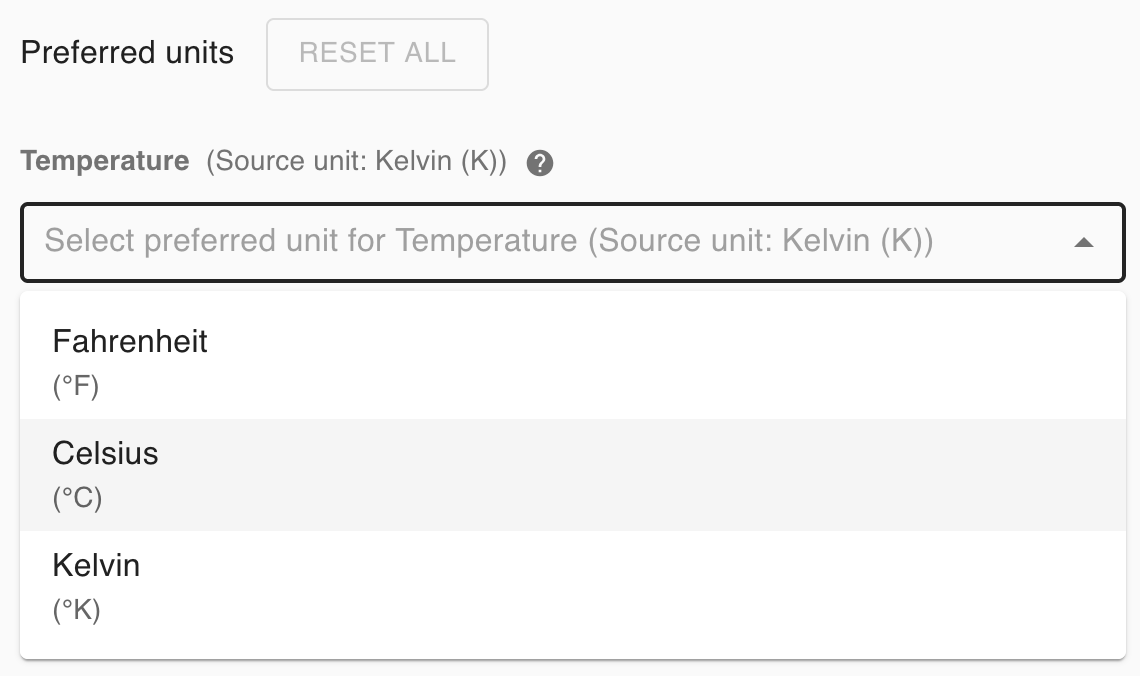
Selecting a personal preferred unit
Users can personalize how measurement data is displayed by selecting a preferred unit for each measurement profile. This override allows the user to see values in the unit they find most intuitive, regardless of the default or group-assigned units.
To do this:
-
Click this icon on the top right of the page:
-
Click Settings.
-
Navigate to Profile on the left:
-
Scroll down to the Preferred units section:

From this view, the user can select any preferred unit as their personal default for the measurement profile, ensuring all related attributes display in that unit regardless of group or system defaults: